Now that the underlay has been configured, you can now move on to the overlay configuration.
In this section, you will create the necessary files to configure the VRFs and Networks for your staging fabric.
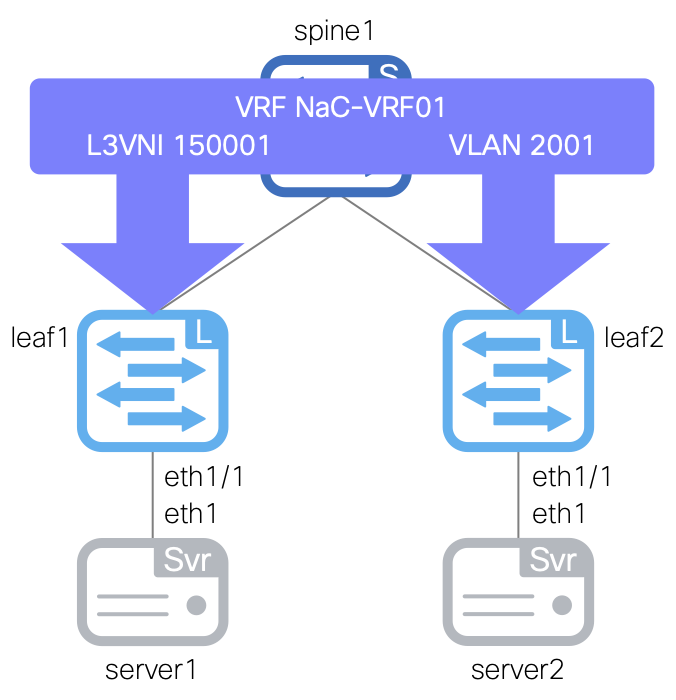
You will start by creating the vrfs.nac.yml file. This file will contain the VRF configuration for your staging fabric, which defines the VRF names, VRF IDs, VLAN IDs, and VRF attach groups.
touch ~/workspace/ndlab/nac/host_vars/fabric-stage/vrfs.nac.yml
code-server -r ~/workspace/ndlab/nac/host_vars/fabric-stage/vrfs.nac.yml
---

vxlan:
  overlay:
    vrfs:
      - name: NaC-VRF01
        vrf_id: 150001
        vlan_id: 2001
        vrf_attach_group: all
    vrf_attach_groups:
      - name: all
        switches:
          - hostname: staging-leaf1
          - hostname: staging-leaf2
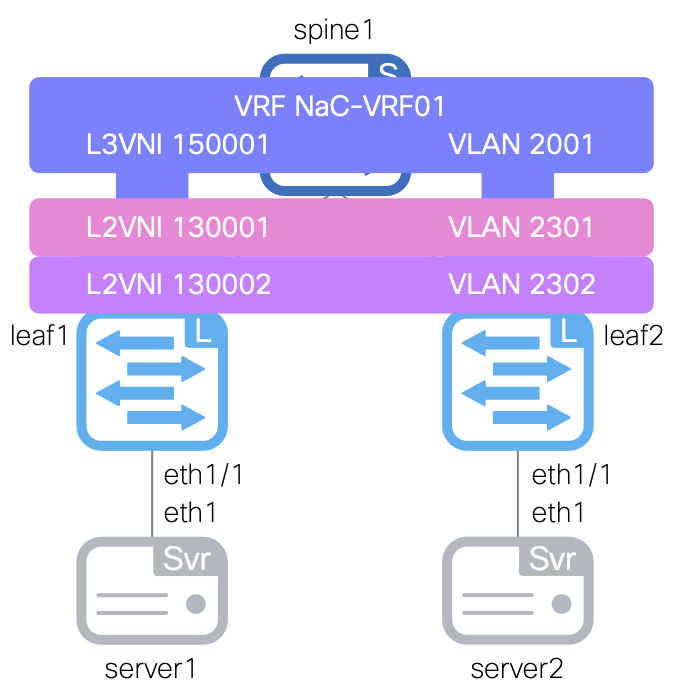
Next, you will create the networks.nac.yml file. This file will contain the Network configuration for your staging fabric, which defines the network names, VRF names (newly created above), network IDs, VLAN IDs, VLAN names, gateway IP addresses, and network attach groups.
touch ~/workspace/ndlab/nac/host_vars/fabric-stage/networks.nac.yml
code-server -r ~/workspace/ndlab/nac/host_vars/fabric-stage/networks.nac.yml
---

vxlan:
  overlay:
    networks:
      - name: NaC-Net01
        vrf_name: NaC-VRF01
        net_id: 130001
        vlan_id: 2301
        vlan_name: NaC-Net01_vlan2301
        gw_ip_address: 192.168.1.1/24
        network_attach_group: all
      - name: NaC-Net02
        vrf_name: NaC-VRF01
        net_id: 130002
        vlan_id: 2302
        vlan_name: NaC-Net02_vlan2302
        gw_ip_address: 192.168.2.1/24
        network_attach_group: all
    network_attach_groups:
      - name: all
        switches:
          - hostname: staging-leaf1
            ports:
              - port-channel10
          - hostname: staging-leaf2
            ports:
              - port-channel10
Make sure you are in your root Ansible directory
cd ~/workspace/ndlab/nac
From the root Ansible project directory execute the following command:
ansible-playbook -i hosts.stage.yml vxlan.yml --tags cr_manage_vrfs_networks
Upon a successful run of the playbook your output should look as follows:
  <... SNIP ...>

  PLAY RECAP **********************************************************************************************************************************************************************
  fabric-stage               : ok=231  changed=33   unreachable=0    failed=0    skipped=742  rescued=0    ignored=0


  PLAYBOOK RECAP ******************************************************************************************************************************************************************
  Playbook run took 0 days, 0 hours, 1 minutes, 29 seconds


  TASKS RECAP *********************************************************************************************************************************************************************
  Wednesday 29 October 2025  11:44:00 +0000 (0:00:00.368)       0:01:29.306 *****
  ===============================================================================
  cisco.nac_dc_vxlan.create : Manage Fabric Networks in Nexus Dashboard ---------------------------------------------------------------------------------------------------- 2.53s
  cisco.nac_dc_vxlan.common : Display Flag Values -------------------------------------------------------------------------------------------------------------------------- 2.14s
  cisco.nac_dc_vxlan.common : Get POAP Data From POAP Enabled Devices ------------------------------------------------------------------------------------------------------ 1.84s
  cisco.nac_dc_vxlan.connectivity_check : Get Cisco Nexus Dashboard Fabric Controller Version ------------------------------------------------------------------------------ 1.59s
  cisco.nac_dc_vxlan.create : Manage Fabric VRFs in Nexus Dashboard -------------------------------------------------------------------------------------------------------- 1.54s
  cisco.nac_dc_vxlan.create : Attach Loopbacks to VRFs in Nexus Dashboard -------------------------------------------------------------------------------------------------- 1.20s
  cisco.nac_dc_vxlan.create : Get Multisite Fabric Associations in Nexus Dashboard ----------------------------------------------------------------------------------------- 1.11s
  cisco.nac_dc_vxlan.common : Build Fabric Creation Parameters From Template ----------------------------------------------------------------------------------------------- 0.86s
  cisco.nac_dc_vxlan.connectivity_check : Verify Authorization to Nexus Dashboard ------------------------------------------------------------------------------------------ 0.80s
  cisco.nac_dc_vxlan.validate : Copy Service Model Data to Host ------------------------------------------------------------------------------------------------------------ 0.75s
  cisco.nac_dc_vxlan.common : Build Fabric Switch Inventory List From Template --------------------------------------------------------------------------------------------- 0.71s
  cisco.nac_dc_vxlan.common : Build vPC interface -------------------------------------------------------------------------------------------------------------------------- 0.70s
  cisco.nac_dc_vxlan.common : Build Policy List From Template -------------------------------------------------------------------------------------------------------------- 0.68s
  cisco.nac_dc_vxlan.common : Retrieve NDFC Device Username and Password from Group Vars and update inv_config ------------------------------------------------------------- 0.67s
  cisco.nac_dc_vxlan.common : Build VRFs Attach List From Template --------------------------------------------------------------------------------------------------------- 0.67s
  cisco.nac_dc_vxlan.common : Build Interface ------------------------------------------------------------------------------------------------------------------------------ 0.67s
  cisco.nac_dc_vxlan.common : Build Interface ------------------------------------------------------------------------------------------------------------------------------ 0.66s
  cisco.nac_dc_vxlan.common : Build Interface Po --------------------------------------------------------------------------------------------------------------------------- 0.66s
  cisco.nac_dc_vxlan.common : Build Interface ------------------------------------------------------------------------------------------------------------------------------ 0.66s
  cisco.nac_dc_vxlan.common : Build sub_interface -------------------------------------------------------------------------------------------------------------------------- 0.66s

  ROLES RECAP *********************************************************************************************************************************************************************
  Wednesday 29 October 2025  11:44:00 +0000 (0:00:00.373)       0:01:29.309 *****
  ===============================================================================
  common ----------------------------------------------------------------- 65.10s
  create ----------------------------------------------------------------- 10.66s
  validate ---------------------------------------------------------------- 6.42s
  connectivity_check ------------------------------------------------------ 3.94s
  common_global ----------------------------------------------------------- 0.05s
  ~~~~~~~~~~~~~~~~~~~~~~~~~~~~~~~~~~~~~~~~~~~~~~~~~~~~~~~~~~~~~~~~~~~~~~~~~~~~~~~
  total ------------------------------------------------------------------ 86.16s
Return to your ND browser where you should be sitting on the Interfaces tab
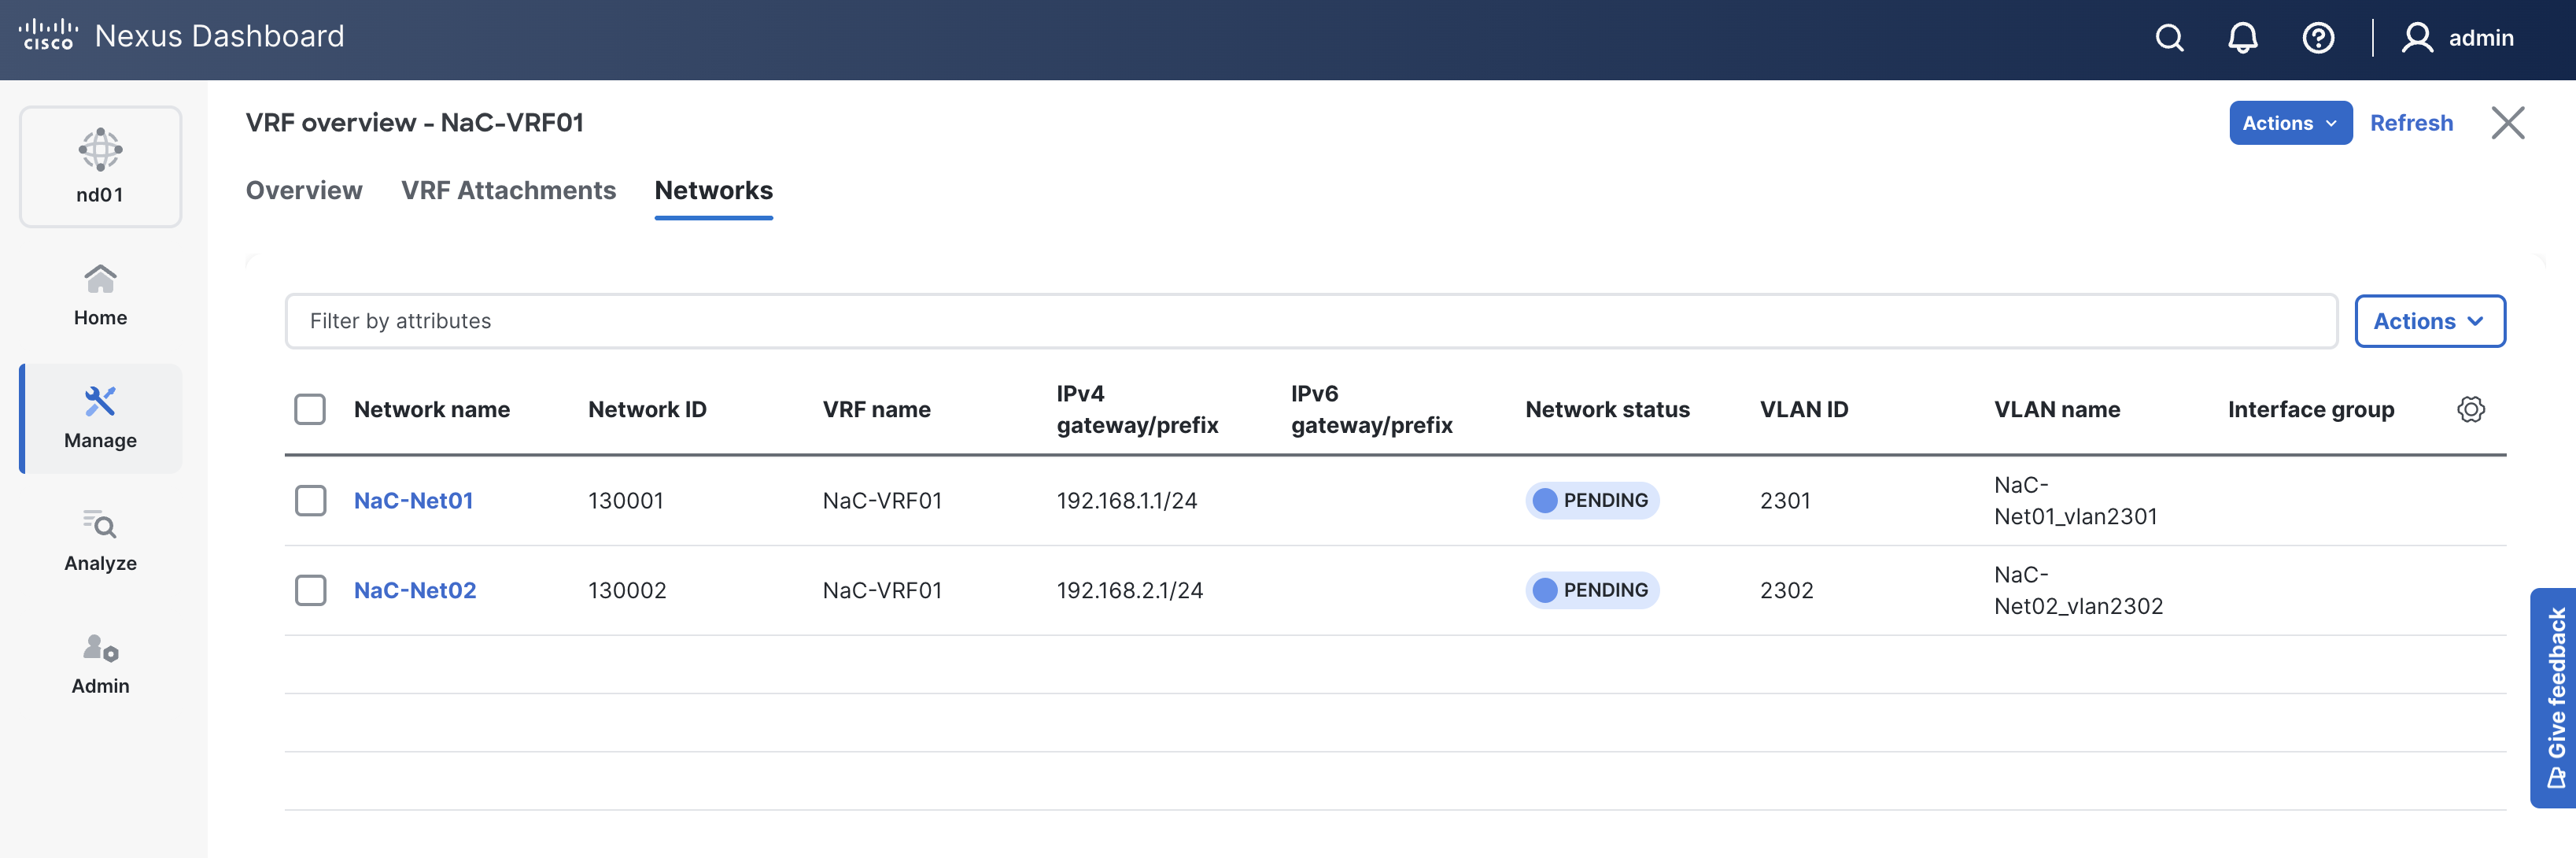
Verify you see the Networks NaC-Net01 and NaC-Net02 that was created by your Ansible playbook.
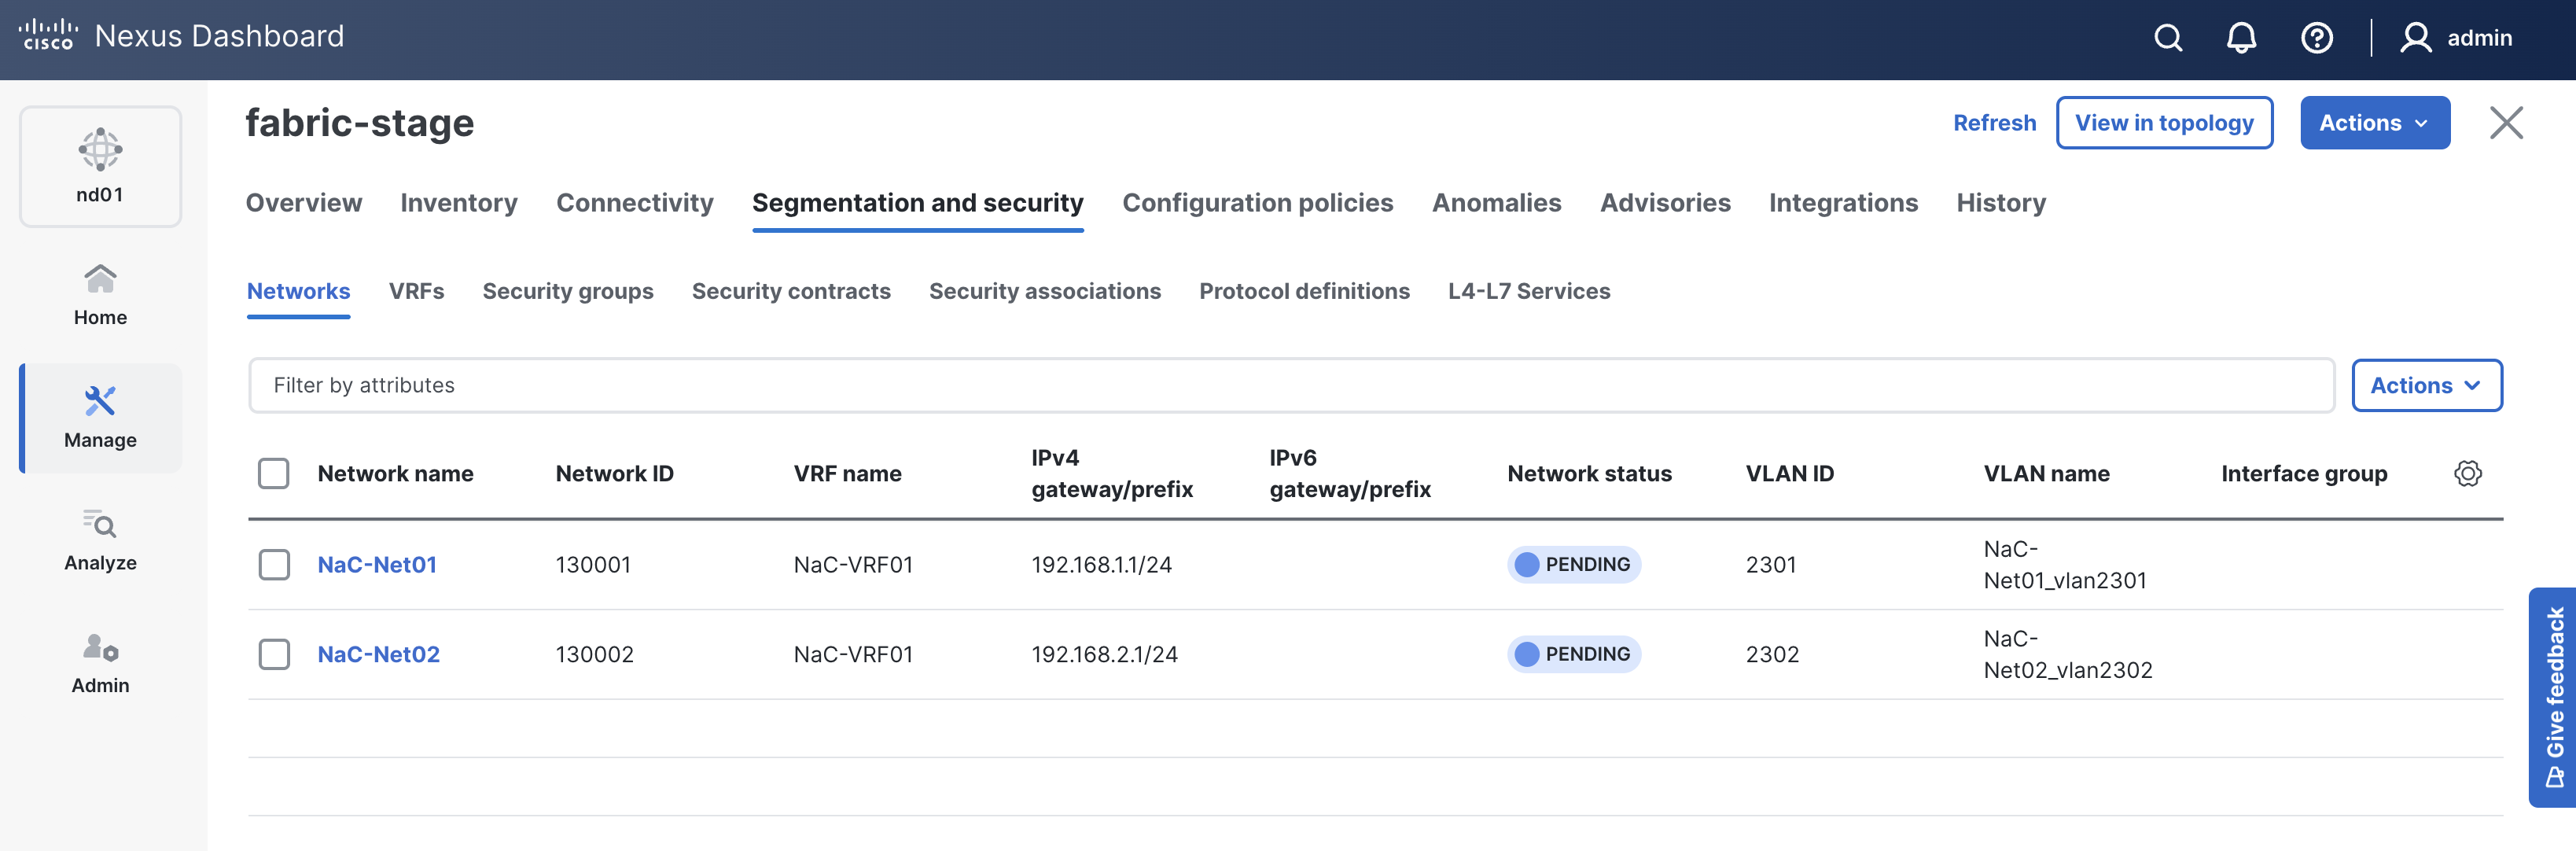
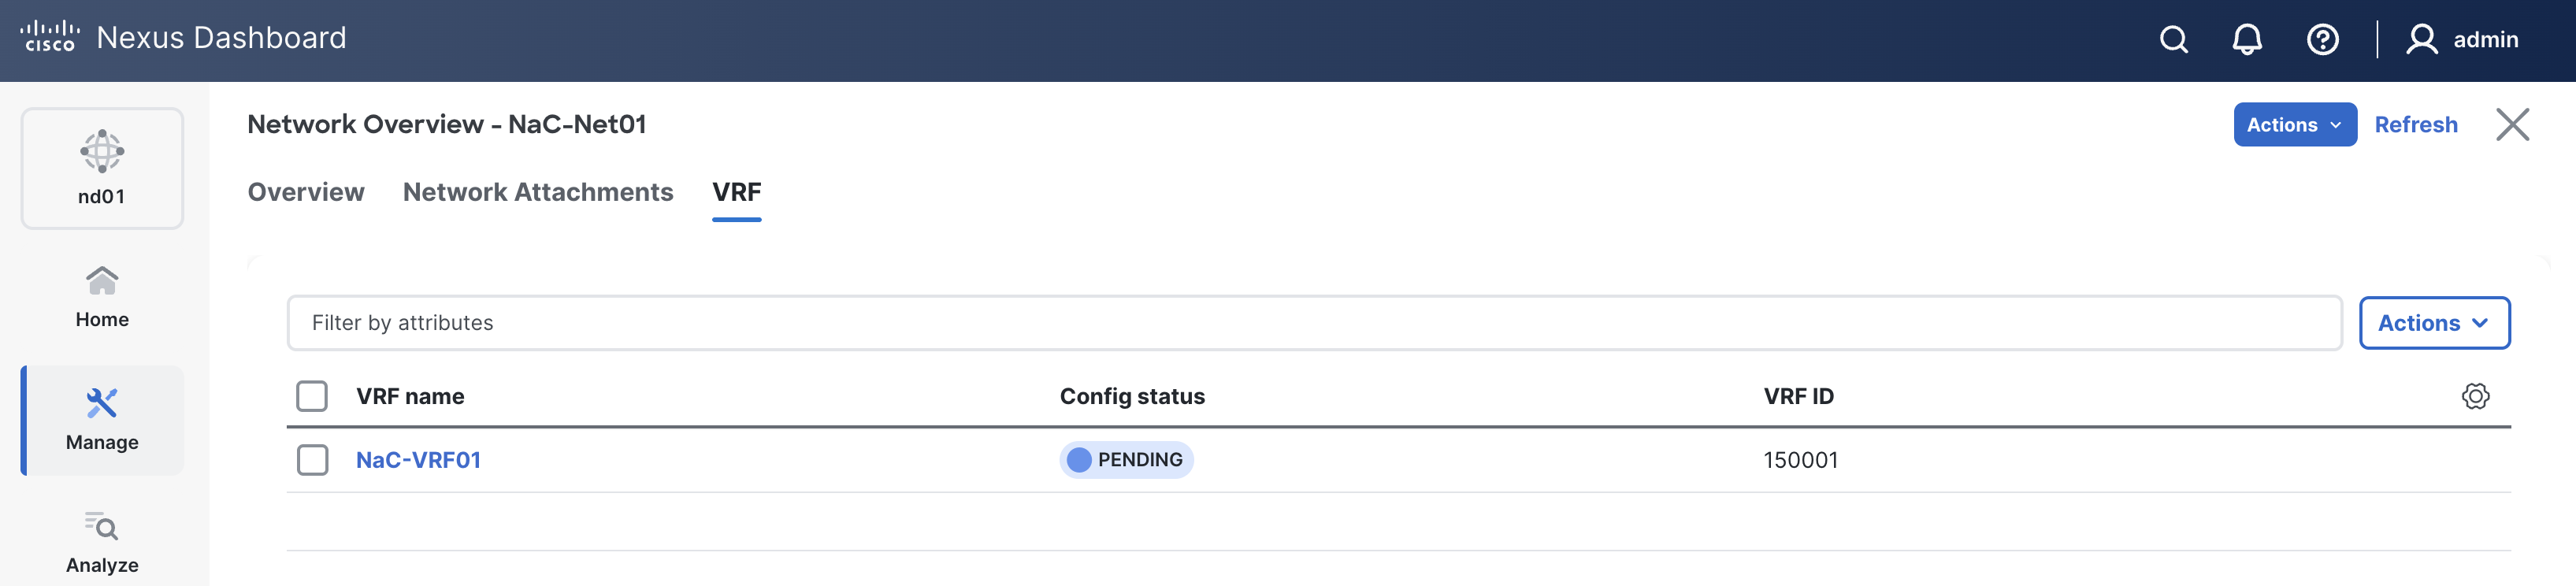
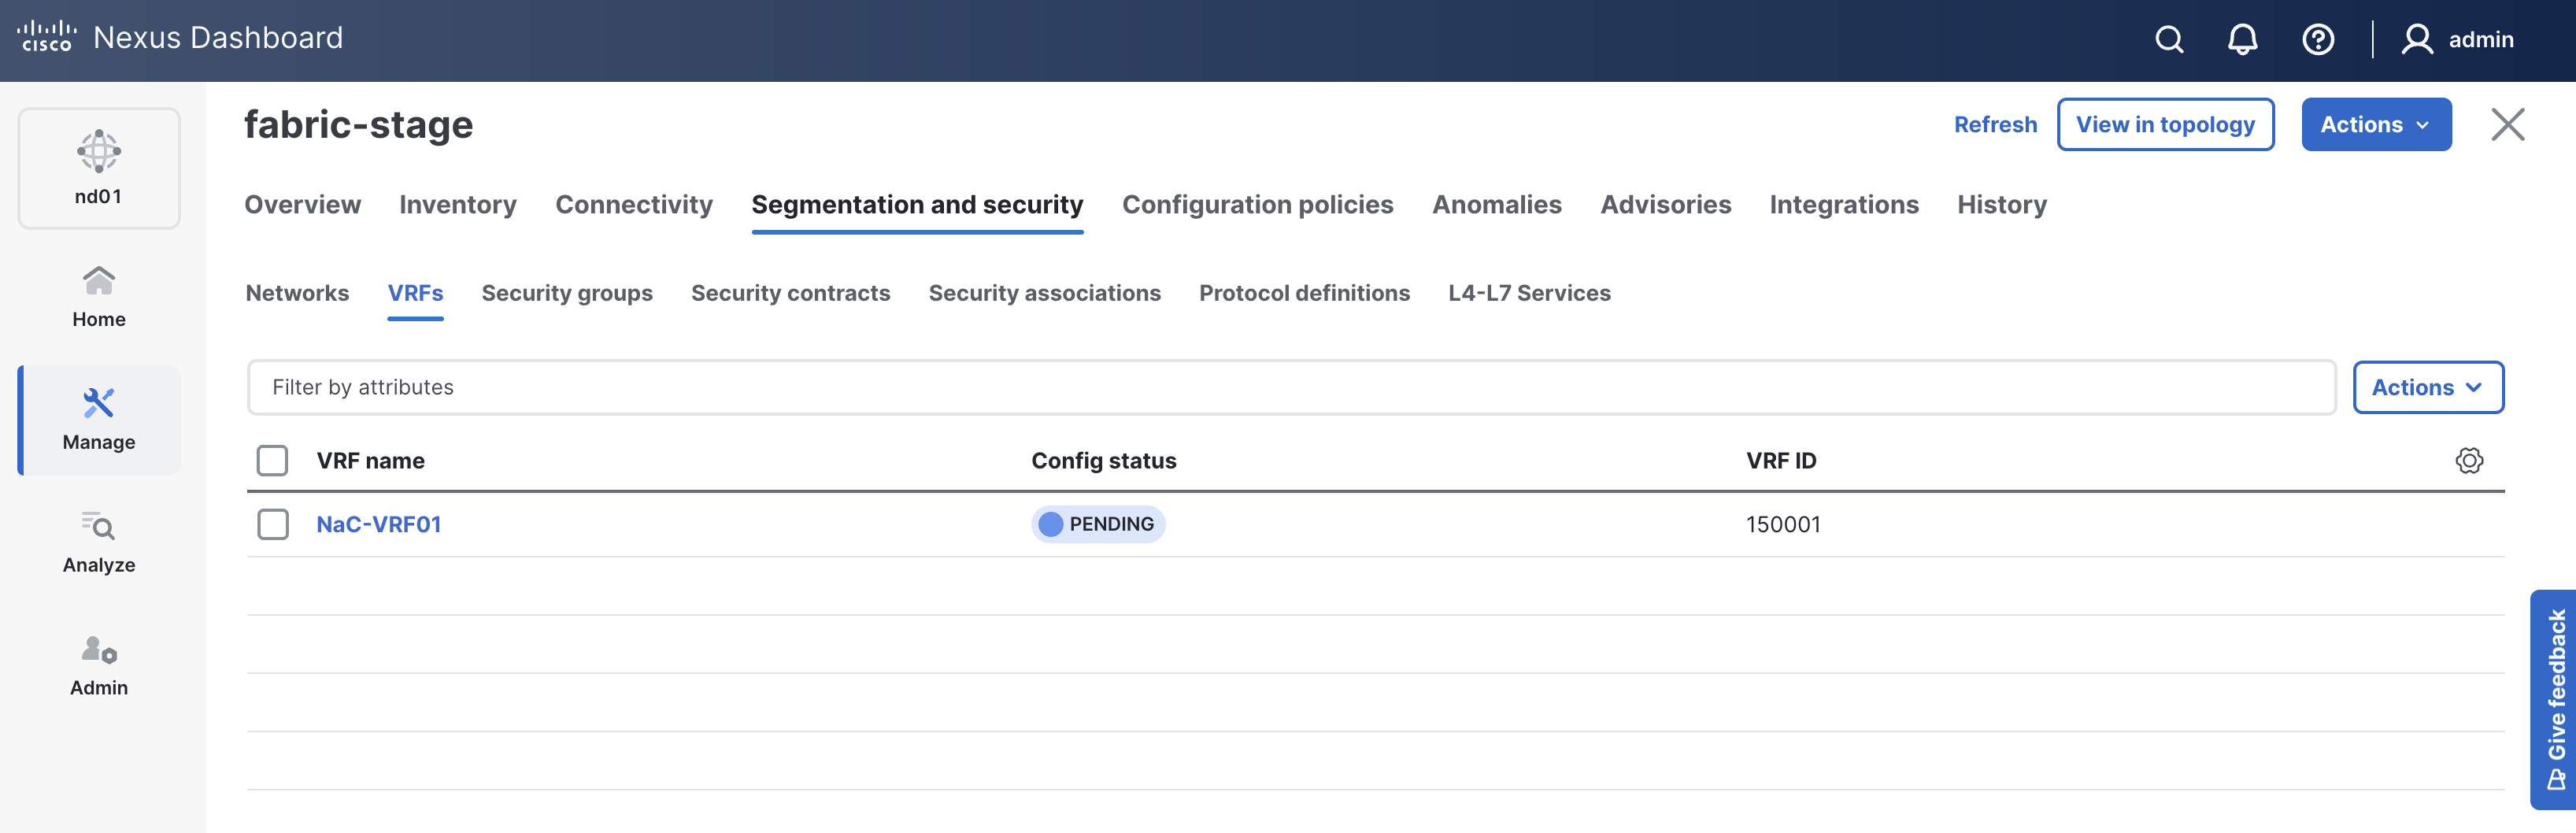
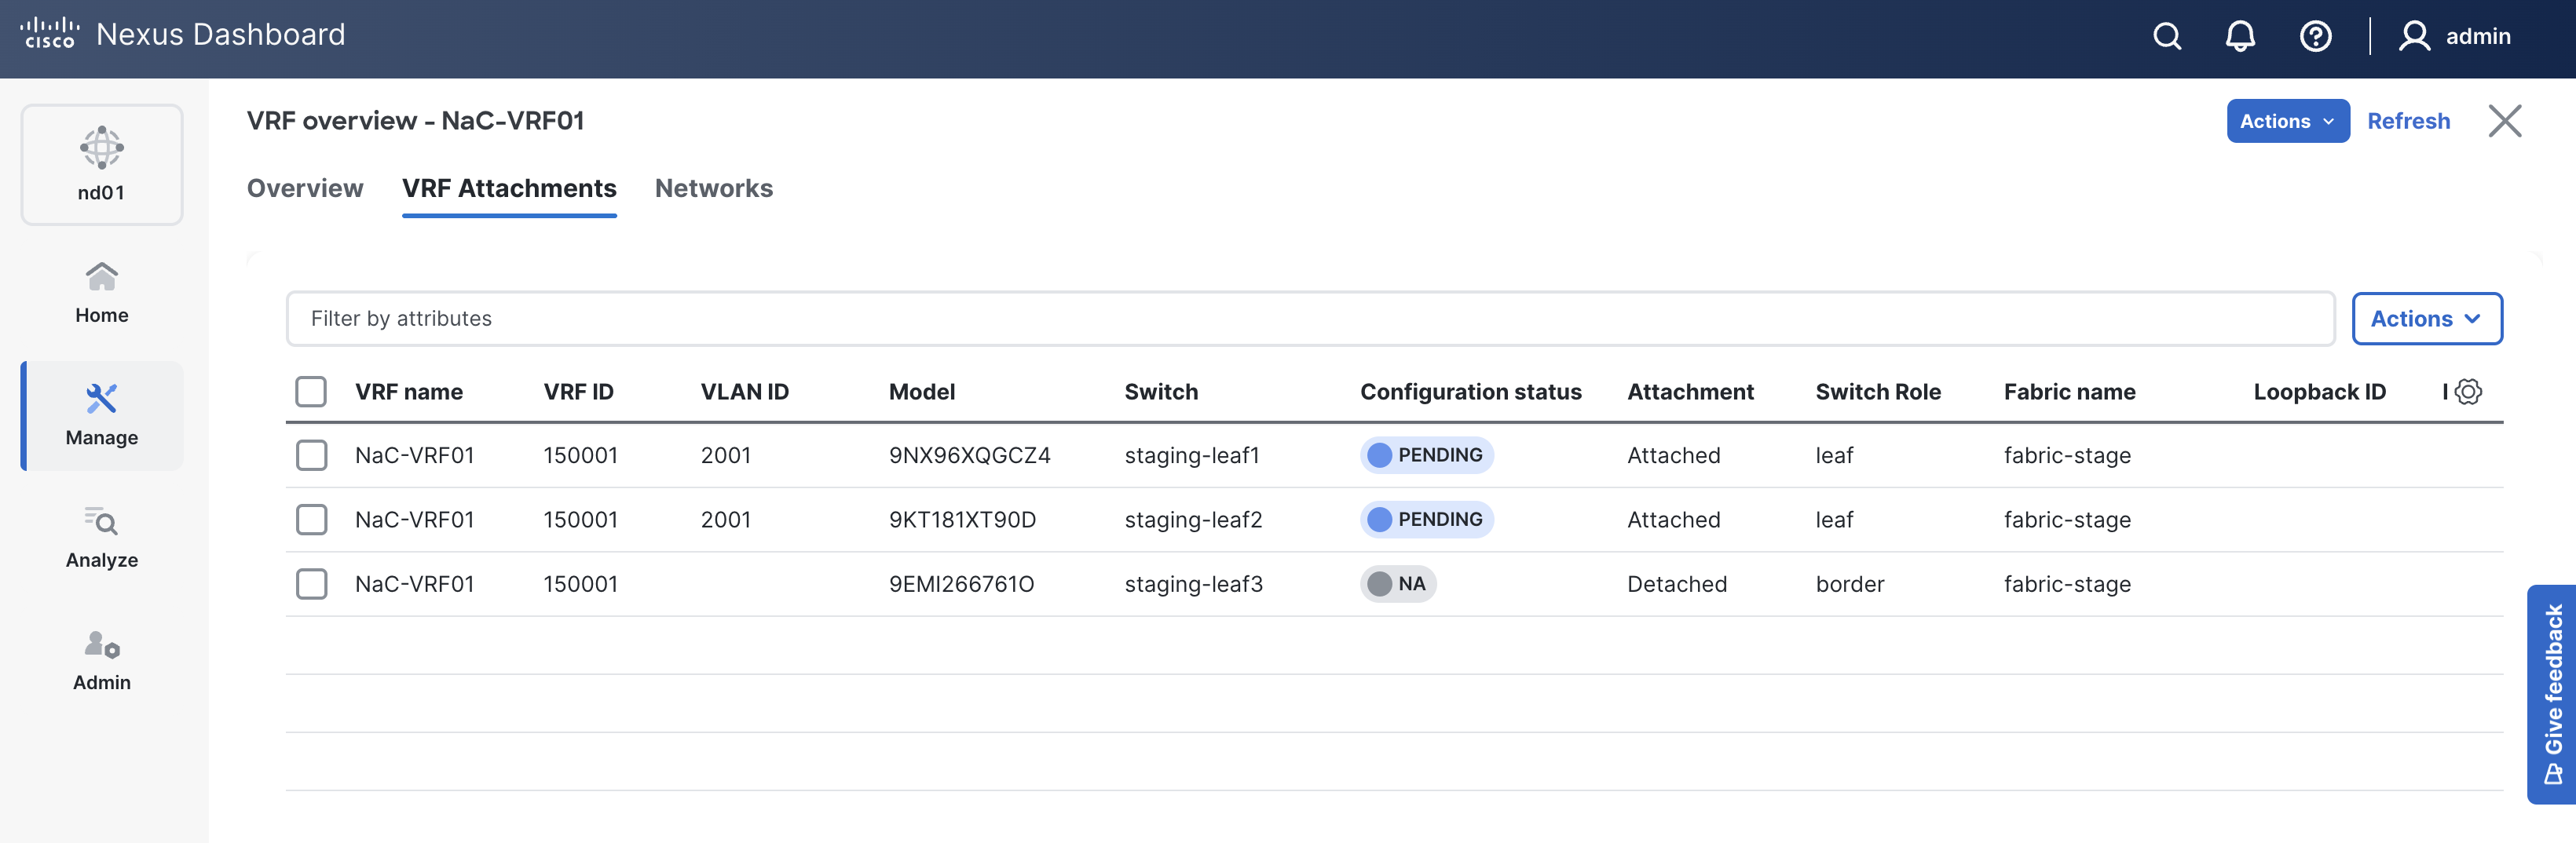
Verify you see the VRF NaC-VRF01 that was created by your Ansible playbook.
Like previous sections, when reviewing the VRFs tab, it is expected to see VRFs in the Pending status since a deployment has not taken place yet.
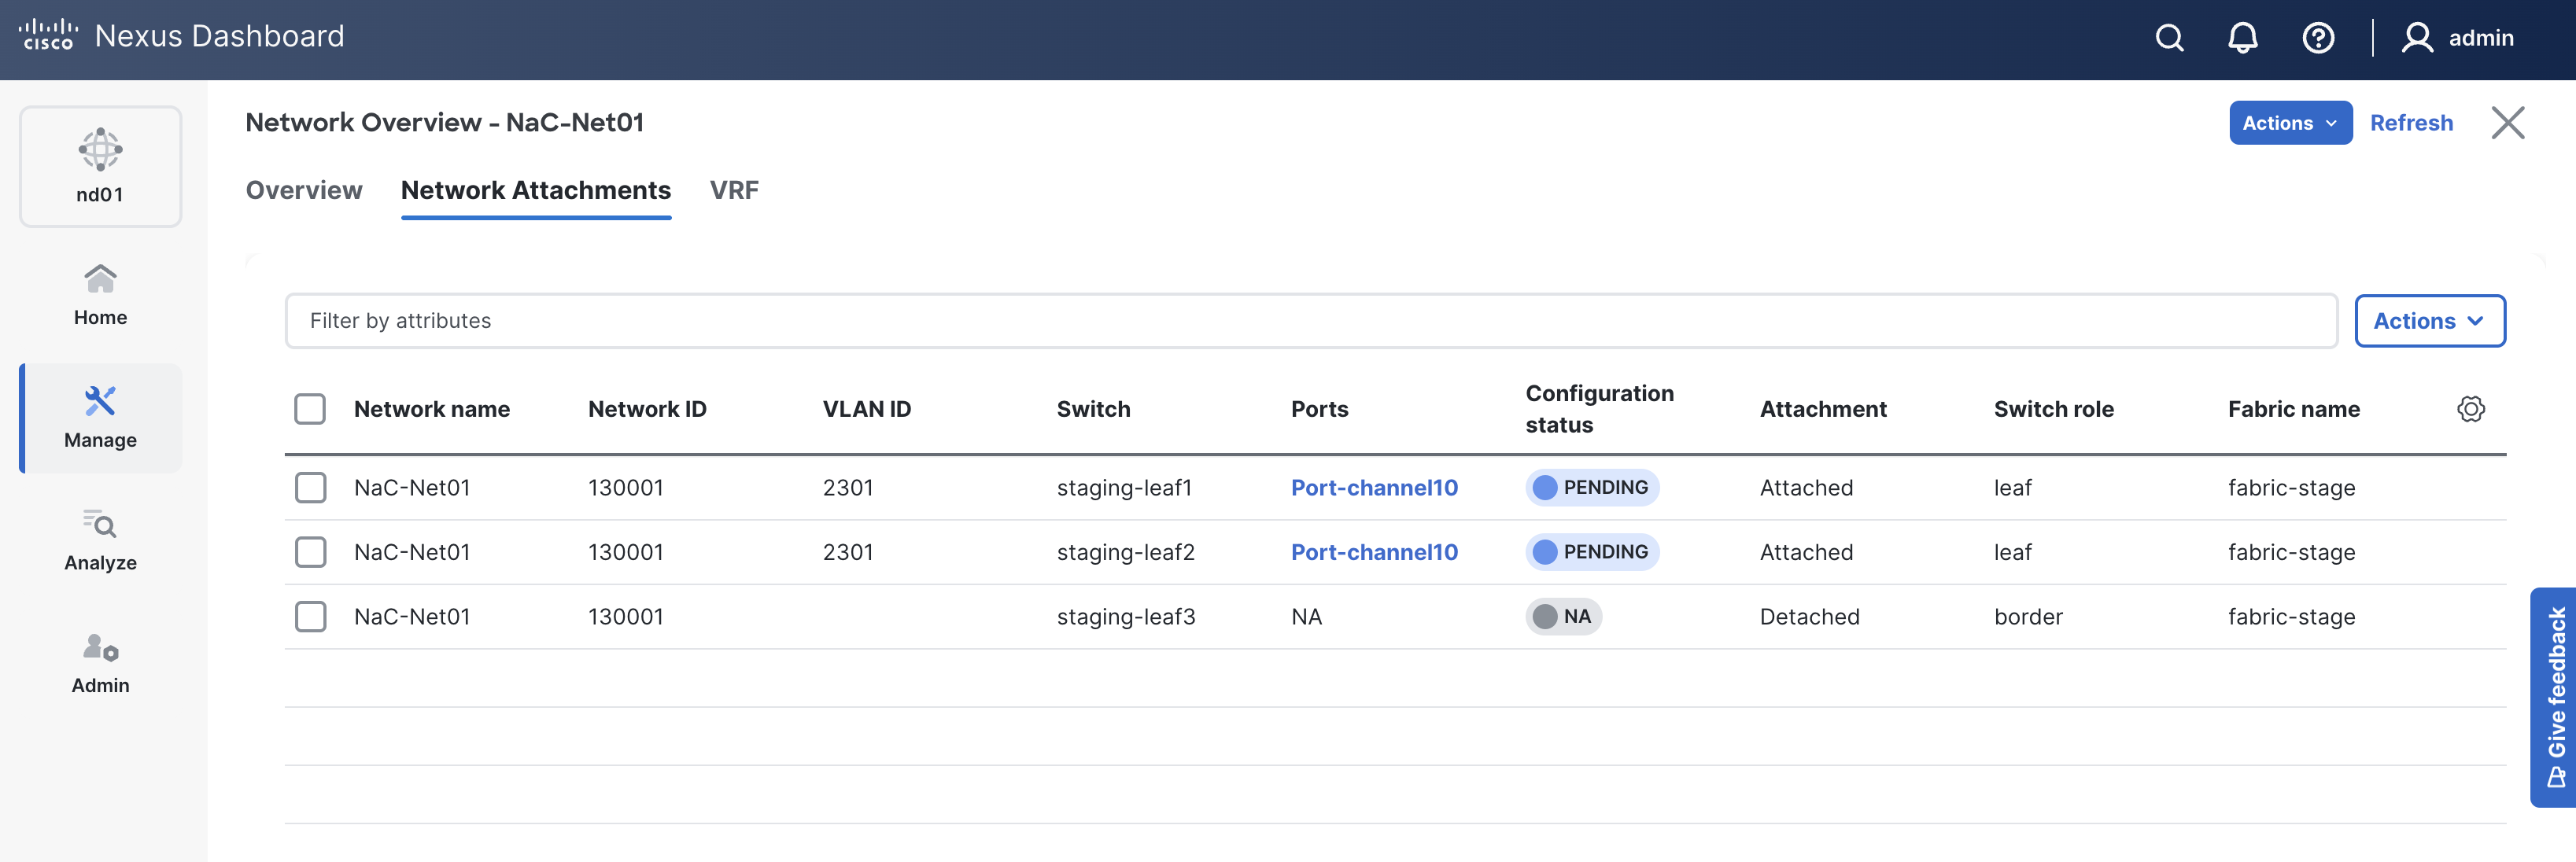
Again, you will deploy to your switches in the deploy role. Following the remaining steps to verify the interface configuration is pre-staged in ND.
Navigate back to your VSCode application.

Continue to the next section to populate the deploy role with the necessary tasks to deploy all of your configuration to your staging fabric.